Crafty WoodCutouts

I am very excited to announce that I will be joining up with
Crafty WoodCutouts team! Haven’t heard of Crafty WoodCutouts? Well, it is a
small, but rapidly growing wood craft supply company out of Provo, Utah. I can’t tell you enough wonderful things about
them! I absolutely love their unfinished wood products that allow you to create
the perfect craft of your design choosing with ease! If you are a fan of Mod
Podging, painting or making all things pretty, then you have to go check them
out! The quality of their products is simply amazing!!! Fantastic customer service
and outstanding attention to detail! Not to mention, Megan is probably one of the nicest people I have ever talked to on the phone. :) And their prices… WOW! If you haven’t
heard enough yet, and you still haven’t opened another window in your browser
to go look, DO IT NOW!!!
Here are a
couple of pieces I made using their wood cutouts:


When the wood cutouts come to you, they will be UNFINISHED
and look a little something like this:

The sky is the limit from there! Your creativity and
craftiness will guide you the rest of the way. “Hold up Dawn,” you say. “I ain’t
got no craftiness or creativity. But I
still want something pretty.” No need to
worry my friend! Crafty WoodCutouts can help. They have a blog right on their
website with fantastic tutorials and pictures to guide you every step of the
way. Still stumped? I’m always here to help too! I can either help you with ordering products, or help you with creating the craft you invision.
So what are you waiting for! Go check it out! They have something for just about everyone, every holiday and celebration. And tell them
Dawn set y’all from way down yonder in Louisiana! :)

See you again soon! Until then... I'm off to The Craftcation Conference in sunny Ventura, California!
Have a happy and safe Easter everyone!


Moss LUCKY Letters

Ahh, I just love this time of year! Spring is in the air, so
many holidays but so little time to craft!
The story of my life recently. I have been up to my ears in projects for
customers and teaching craft classes that I haven’t had a moment of time to craft
for myself. Well today I said the heck with the household chores. It's time for a little proCRAFTination! The dishes
and the laundry… eh, they can wait. This lady needs to craft!
Let me start by saying I am a proud Irish girl!!! In my family, being Irish is celebrated
year round, not just the month of March.
Some of my greatest memories as a child are with my mother’s side of family,
(McManus, just a wee bit Irish huh?) and the millions of cousins running around
to the sound Peter Yates Irish Folk music playing in the background. With all these happy memories floating around
in my head, I just had to make something to celebrate St. Patrick’s Day.
So I got to work and gathered the supplies I needed:

3D letters, Spanish moss, forest green acrylic paint, paint
brush, some accessories, scissors and a hot glue gun.

Paint your letters and let them dry.
Hot glue the moss to the letters. Trim and shape moss to your desired
look.

Glue down your accessories for the finishing touches.

And there you have it! Wasn’t that easy?
So glad I decided to do a little proCRAFTination today! But as
you all know there is always laundry and dishes to be done. Boo. Especially in a house full of
boys. Happy St. Patrick's Day everyone! Until next time!

What a Great Week!
What an amazing week it has been! I feel so blessed! Oh my goodness! My Burlap and Pearls project was featured over at Craftionary and at Create, Craft, Love. Oh, and it has been repinned on Pinterest over 2,000 times!!! Ok, ok, ok…, I know I am just a start up blogger and this isn’t really a big deal in the great big world of blogging… but this is a HUGE accomplishment for me, and a girl has to start somewhere! I feel like I’m on top of the world!

Ha, ha, ha... so not quite.... but you get the idea!
In other exciting news, I am going to be offering craft classes out of my home. I love crafting and I miss teaching so much…, it was a no brainer to put the two together! My first class is next weekend!
This is the first project we will be making in the adult class:

I was inspired to teach a class based on her design.
I will also be offer a kid’s craft class as well.
This is what we will be making on February 23 for that class:

Many new and exciting opportunities are happening for this lady and I am just so darn excited I can barely contain myself!
Craftcation is coming up! Are you going? I AM!!! Haven’t heard about it?

Burlap and Pearls

Now on to my BIG BOY! After what I can only estimate was close to 15 or so hours in the bathroom last week with my three year old Big D, potty training was successful! Wahoo! Oh yeah, did I mention that my husband was out of town for work last week, so I tackled the majority of this potty training fiasco on my own!
Mommy bragging aside, after last week’s project I couldn’t stop thinking about
Valentine’s day and all the pretty things I could make. So I decided to make
another Valentine themed project. Most of the supplies I already had sitting
around in my craft room, so I jumped right in! Here are the supplies I
gathered:

An old frame, spray paint, staple gun, foam board, burlap,
pearls, lots and lots and lots of pearls, hot glue gun, and a preprinted or hand
drawn heart shape to glue your pearls to.


I got this old frame at a cute little antique store called Second Hand Rose Antiques. Milly Rose, the owner is such a sweet little lady. I love
going there just to visit with her. Not to mention look through her enormous
four story collection of antiques and collectables!

I gave the frame a coat of spray paint in Cherry Red, let it
dry and set it aside until I was ready for it again.
I cut the foam board down to the size I needed it to fit the
frame and covered it with the burlap fabric using my hot glue gun to secure it
in place. Then I attached the foam board to frame using a staple gun.
Now on to all those pretty, pretty, pearls. Anytime I find
myself at garage sales, estate sales or flea markets I HAVE to go check out the
old jewelry. I don’t know what it is about it, but I love it. I have a nice
little collection of yellow and orange costume jewelry going and I can’t wait
to get that project started once I have enough pieces collected! Going to be so
pretty! :) The pearls I used in this project came from various estates sales,
and antique stores that I collected over the past few months. The pearls are
different colors, sizes and several even have some noticeable flaws. Each of these pearls has a different story or
memory that is very special to someone at some point in time. I just love that,
and is easily my favorite thing about this project. I didn't have near enough when I took the supplies picture above, so I had to go out and find more.

I started gluing...and kept on gluing; in no particular
order or pattern for five hours. Until it looked like this:

Totally worth it though!! Isn’t it GORGEOUS!!! I love it! The lighting in this picture made the pearls look much lighter than they actually are, but you still get the idea. :)
All there was left to do was glue the pretty pearl heart to
the burlap frame and find a new home for it on the wall. In my initial crafting
brainstorm, I had planned to add a little lace around the pearl heart. In the end I decided that it looked beautiful and elegant just the way it was.
What have you made for Valentine’s Day? I’d love to see!
Please share your link with me so I can take a look a your beautiful creations
as well! Thanks for stopping by!
Valentine's Day Subway Art

If I were to sum this project up in one word it would be
flexibility. It didn’t go at all the way I had originally planned, but it still
turned out pretty neat in the end. And I even learned some valuable lessons along the
way.
I wanted to a project that involved my new Silhouette Cameo my husband got
me for my birthday and since I put my Valentine’s Decorations up this week. I
decided something pink was in order. I settled on a Valentine Subway Art
project.
Now, in the beginning, I had planned on doing a crackle
paint project. This is Plan A, and the supplies I gathered:

I gave the wood plaque a coat of the Americana Acrylic paint
in Carousel Pink and let it dry 24 hours. Then I applied the Martha Stewart Crafts
Fine Crackle Effect in smooth even strokes and let that dry and followed it with
a coat of Americana Acrylic paint in Warm White. Now…, if you have been
following the weather at all, Louisiana and most of the southern states have
been getting dumped on with rain. As a result, the LESSON I LEARNED the hard way,
this particular crackle effect medium does
not work in high humidity conditions.
So on to Plan B: I gave it ANOTHER coat of the Americana Acrylic
paint in Carousel Pink and let it dry and followed with a coat of Americana
Acrylic paint in Warm White. Nothing another coat of paint can’t fix, right!!! ;
) After it was dry I sanded the edges and distressed it up a little.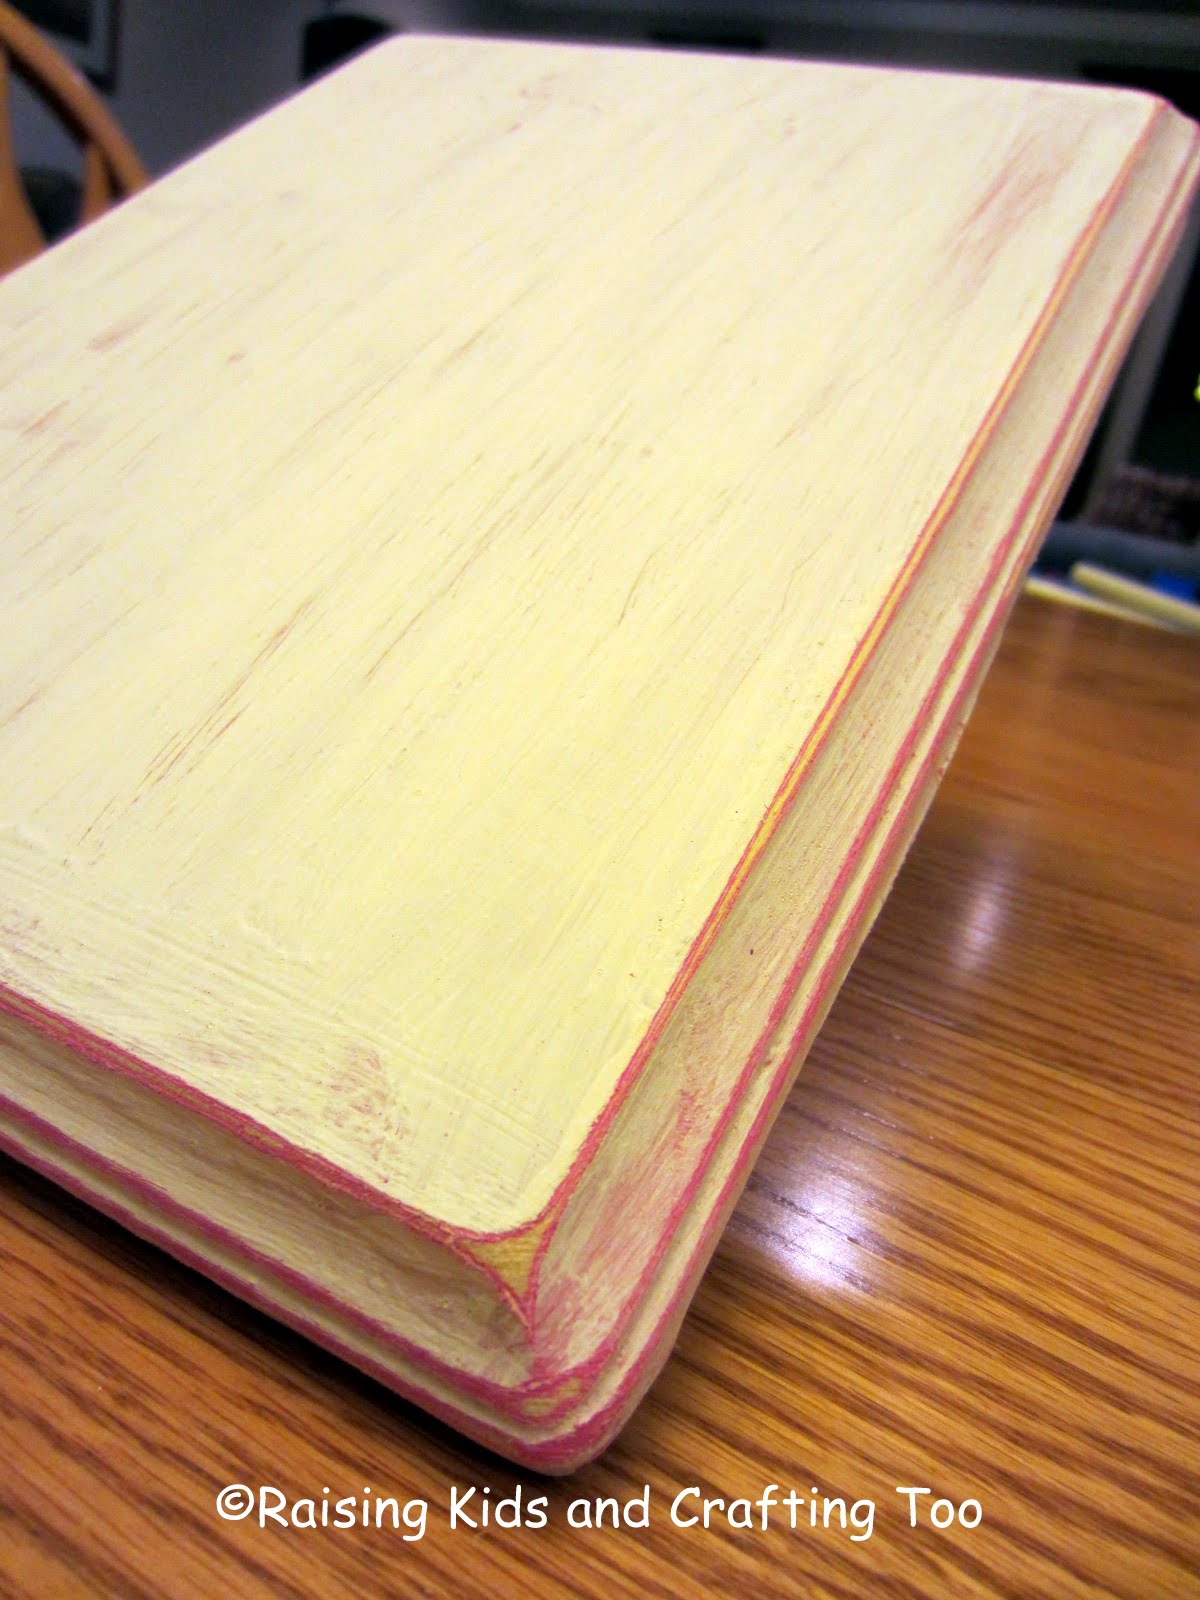
I found a file on the Silhouette website that I liked (hey, I’m
a rookie, I’m not about to create my own just yet) and cut it out. Let me tell you that
machine is ridiculous! Even my husband is in awe of the Cameo! It is so awesome! To quote Woody
from my son’s favorite movie Toy Story, “If you don’t have one, GET ONE!” hehehehe, I just love that movie :)
Once your letters are cut out, grab a cup of coffee, or
wine, diet coke whatever you like and pull up a chair because this part takes a
little bit of time. With a glue pen, attach the letters to your wood plaque using the images on the cutting mat as your reference.

Add a little Mod Podge and let it dry to seal everything up and give it a shine.
And there you have it! What do you think?

As always, thanks for stopping by and come back and see me
again!
Ugly Duckling Stand

I get so excited when I find something ugly in a store and I
know that I can fix it up into something beautiful! That’s exactly what happed with this pretty
little thing!!!

Ok, ok. I know. It’s hideous. But nothing a little paint and
elbow grease can’t fix!

I wanted to paint this in ASCP Antibes Green, but I had a
customer in mind that I knew would love to have it in Duck Egg Blue. And why
wouldn’t she? It’s a gorgeous color! ; )

I paired it some accenting details in Old White and gave
it a few coats of Clear Wax.
I finished it off with a creative touch by Mod Podging some of
my favorite scrapbook paper into the drawers of the stand. I love how it turned out! A striking
difference from what it once was!!!

On a side note, this past week I celebrated my 29th
birthday. Wow! To celebrate the last year of my twenties, my husband got me the
most amazing gift! A Silhouette Cameo!!! I can’t wait to see all the trouble
that baby is going to get me into! ;) Come
back and see me soon!
Crafting in the Car

Well hello again one and all! For those of you out there who
follow my blog let me start out by saying THANK YOU and sorry for not staying
in touch. As most of you know, as life always seems to go, things always seem
to get crazy this time of year! Kids get sick, mommies get sick (and then the
house comes to a stand-still) holiday vacations get in the way and so on and so
on. Add to all this military travel, and
lost Blogger passwords. Yes, makes for one frazzled blogger! But fear not, my
crafting did not stop. Oh no, no! Quite the opposite actually! I don’t think my
craft room has ever been busier.
The Mistletoe and More Craft Show in November was a huge
success!!! After the first day, I sold so much of my merchandise I had to stay
up late that night making more stuff to put into the show the following day! J I met some wonderful people and I
am looking forward to continuing the Shop ‘till You Drop Craft Shows in Bossier
City in the future.
The One Wreath the Turned into Twelve actually turned into twenty
something. I lost count. They were selling like hotcakes!!! I had so much fun
making them! Each one was different and unique in its own special way. I always love projects that you truly and
honestly have fun with. That’s what this week’s blog post is all about after all.
Now, I had a blast creating this project, but I will put this disclosure out
there first and foremost… crafting while you travel is not for everyone. Make
sure you have a great travel buddy (honey, you’re the greatest) and most
importantly I recommend using glitter free ribbon! J
The car is loaded up and the kids are in their car seats and
we are ready to hit the road on our holiday trip to Arkansas and Hubby asks,
“Did we forget anything?” and I say… “What can I make in the car in seven hours?”
For a second my mind run wild! Luckily, I was able to make a quick decision. I
have an amazing sister-in-law who asked me to make her a fun snowman wreath for
Christmas. I believe “are you kidding me” was being grumbled from the garage
but I was too busy grabbing supplies to hear exactly what was being said (like
I said honey, you’re the greatest!). Here’s what I grabbed: Various coordinating
colored wire ribbon, foam wreath form, T-pins, coordinating embellishments,
scissors, and a hot glue gun (yep, that’s right, a hot glue gun. I have a power
inverter in my car).
 And away we went! Down the road and a crafting we did go!!!
When I said earlier I recommend using glitter free ribbon, here is why. As you
attach the ribbon to the wreath form, the ribbon will shed glitter if it has
glitter on it. I don’t think my car will
ever be the same again. A lady actually
asked what happed to me at a gas station because I was covered in so much
glitter. My response: “Nothing.” I said. “Just crafting in the car. ;)”
And away we went! Down the road and a crafting we did go!!!
When I said earlier I recommend using glitter free ribbon, here is why. As you
attach the ribbon to the wreath form, the ribbon will shed glitter if it has
glitter on it. I don’t think my car will
ever be the same again. A lady actually
asked what happed to me at a gas station because I was covered in so much
glitter. My response: “Nothing.” I said. “Just crafting in the car. ;)”Now remember I have two small kiddos, and a dog. So snacks, diaper changes, potty breaks, bottles, crying and screaming goes in with all this crafting fun!!!
With all of the ribbon finally attached it was time to fire up the glue gun to attach the embellishments. Here’s where Hubby got real nervous! He was convinced I was going to either burn myself or the leather seats.

Neither of course happened and out came a fun, festive snowman wreath!

What
do you think? Do you like how it turned out? I hope you all found a little bit
of humor in this crafting adventure and might even tell your friends about my
crazy crafting adventures too! Have a
very, very Merry Christmas and a wonderful New Year!!!! Until the next adventure!
One Wreath that Turned into Twelve
I'm sure
many of you crafty folks out there are always looking for a new challenge. Me,
I am no different. I kept seeing these beautiful college football wreaths on
our neighbor’s doors, and decided that we needed to have one too. Not just for
the fact that our neighborhood is a little LSU saturated and needed a some Razorback
red to liven things up a bit, but because I needed a new challenge. So I gave
it a try. Here is what I came with:

I shared a
picture with my sister and she loved it! She asked if I could make other teams,
like say…, Duke, her husband’s favorite team. I said Sure! Why not! Here’s how
that one turned out:

After some
encouragement, she convinced me to ask my Facebook friends what they thought
about them, and if they would want one too. Twelve wreath orders later, needless to
say they have been very popular!

I have
teacher door wreaths, monogram wreaths, Christmas themed, and more sports wreaths on the way! So that’s
what I have been working on this week! It was a supposed to be a quick challenge
that turned into a BIG one. But I’m having fun filling these orders! And I’m
learning all kinds of new techniques for wreath making! If you have any
questions please let me know and as always thanks for stopping by!
Antique Door Handle Clock
Happy Monday Everyone! I have been quite the busy lady in my
craft room recently! I’m creating some great new things for the upcoming craft
show next month. It’s hard to tell what
will sell well and what will not, so I am making a WIDE variety of things. This
little beauty is one I am most proud of.

It is a fully functional pendulum clock made from an old
door handle and barn wood my in-laws graciously allowed me take from the farm. I am always coming across antique door handles
and plates at flea markets and thought they might make for a unique wall hanging. While I was at it, I thought to myself “I bet I could make that into a clock somehow.”
Sure enough… a few broken drill bits
later, (sorry again honey) it all came together! I tied it all together by swapping
out the round pendulum for a skeleton key. So far I have made three, but this
one in particular is my favorite. I was
planning on selling it, but I’m not so sure now…, it’s looking pretty cozy up
there on my wall. :) I hope you like it! And as always, thanks for stopping by!

Christmas JOY Blocks
This week’s post is a very exciting one for me! It may be it bit early for some to think about, but Christmas is right around the corner! WHAT?!? You ask? Halloween isn’t even over yet! I know, I know… but I’m so excited that I can’t even contain myself!!! I just reserved my spot at one of the biggest Holiday craft shows of the season here in Northwest Louisiana! It’s called “Mistletoe and More” and I am so, so, so excited to be a new vendor there this year! You can visit their site here. I will be selling several of my one of a kind furniture pieces, and many holiday home décor items. I have SO MUCH to do, and just couldn’t wait to get started! I started rummaging through my garage and craft room to see what I could create in few minutes (really, that’s all I had because my husband was ready to hit the road for our Fall Arkansas trip). I came up with this cute little Holiday Decoration.

You will need: Three scrap 2x4’s pieces. (2-six inch long pieces and 1-three inches long), red acrylic paint, sponge brush, sand paper, adhesive backed glitter paper, electronic cutter, ribbon and a Christmas tree bulb.

I like the distressed look, so I gave my blocks a light sanding around the edges. If you like a more clean, sharp look, skip the sanding. Add the glitter letters, ribbon and Christmas bulb, and tada! A beautiful, easy (and super quick) holiday decoration! Thanks for stopping by!!!

"Upcoming Creations" Dry Erase Board

Well hello again all! Sorry I missed you last week. I was
enjoying some much needed family time while my parents were in town visiting
from Montana. I shut the door to the craft room and enjoyed every minute I
could with them. I don’t get to see them all that often, so it was absolutely
wonderful to have them here with my boys for the whole week!
Sadly, as it usually does, all good things must come to an
end. But, I’m back to work in the craft room now! And it was here that I realized that I needed
something to help keep me focused and track. I don’t know how other crafters
are, but this particular crafter has a
hard time staying focused on just one project at a time. I get so excited about
a project or have a great idea about something else and forget all about what I
am currently working on. Can anyone else relate to this? I decided to create a dry
erase board to help me organize my projects and project ideas.
If you want to
create one for yourself here’s what you will need:
Large Frame with Glass, Spray Paint, Poster Board,
Electronic Cutter, Hot Glue Gun and 4-5 Strings of Large Beads or Jewels

I used a frame that I found at Hobby Lobby in the clearance
rack. It was a great price, but I ended up having to get the glass cut specially
cut for it. LESSONS LEARNED: Make sure
you have a skilled technician cutting your glass. Check and double check it
before you leave the store. Mine came out uneven and crooked. I ended up having
to shave a fair amount off one corner side of the inside portion of the frame to make
the glass fit. It set me back a few hours on this project, but it’s a lesson I
had to learn the hard way I guess. :( Next, I primed it and spray painted it
golden yellow (my accent color in my craft room) and gave it a little
distressing love.

While the paint was drying, I used my Cricut to cut out the letters on vinyl that I adhered to poster board to put inside my frame.

In my mind, I thought this would be enough and that it would look fabulous at this point. Well… it didn’t. It was boring. It needed something else. I found some turquoise beads and added a little bling to the frame!

Much better! What do you think?
It hasn’t found a permanent home on the wall yet, (I can’t
decide exactly where I want it) but for now it is perched happily on top of my
sewing table.

Thanks for stopping by and checking out my lastest creation! There are many, many more to come!
Subscribe to:
Posts (Atom)

Let's Connect


Grab My Button

Featured On


Popular Posts
-
 What a week it has been in my house! I really don’t know which to tell you about first because I am so excited about both! I guess I’l...
 -
 Let the adventure begin! I am so very excited to FINALLY get this blog up and running! But I’m even more excited that I will be able to st...
 -
 As I transformed my home this week into a fall scene of yellows, oranges and reds, I learned two things. One: Leave floral arrangements ...
 -
 If I were to sum this project up in one word it would be flexibility . It didn’t go at all the way I had originally planned, but it st...
 -
 Happy Monday Everyone! I have been quite the busy lady in my craft room recently! I’m creating some great new things for the upcoming c...
 -
 Well hello again all! Sorry I missed you last week. I was enjoying some much needed family time while my parents were in town visiting ...
 -
 Well I couldn’t very well have a beautiful sewing table sitting there all alone in my craft room without a worktable to match now could I?...
 -
 Ahh, I just love this time of year! Spring is in the air, so many holidays but so little time to craft! The story of my life recent...
 -
 I'm sure many of you crafty folks out there are always looking for a new challenge. Me, I am no different. I kept seeing these beau...
 -
 This week’s post is a very exciting one for me! It may be it bit early for some to think about, but Christmas is right around the corner...
Some of My Favorite Blogs
-
perfection vs. personality3 days ago
-
-
Hello world!1 year ago
-
Shop Updates6 years ago
-
Moving On8 years ago
-
Herringbone wood plank accent wall11 years ago
-


